
In this chapter, you will learn about the design, purpose and artistic qualities of seals.
Introduction
Seals to Prints is an important concept in visual arts that explores the process of creating images and designs through stamping and printmaking techniques. From ancient seals used to mark ownership, identity, and official documents to modern printmaking methods, this art form demonstrates how impressions can be transferred onto surfaces such as paper, fabric, clay, and wood. Artists use carved blocks, stamps, seals, and printing plates to produce repeated patterns and artistic images. The study of seals and prints helps learners understand the history of communication, design, and artistic reproduction while developing creativity, craftsmanship, and an appreciation for traditional and contemporary printmaking techniques.
1: Let’s Look at Seals
Have you ever seen your teacher, school principal or anyone in your school using seals and rubber stamps?
Take the help of your teacher to find any paper or document with a seal. Discuss these questions:
1. What is the image or text on the seal?
2. What does the seal convey?
3. What are seals used for?
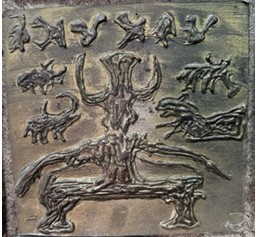
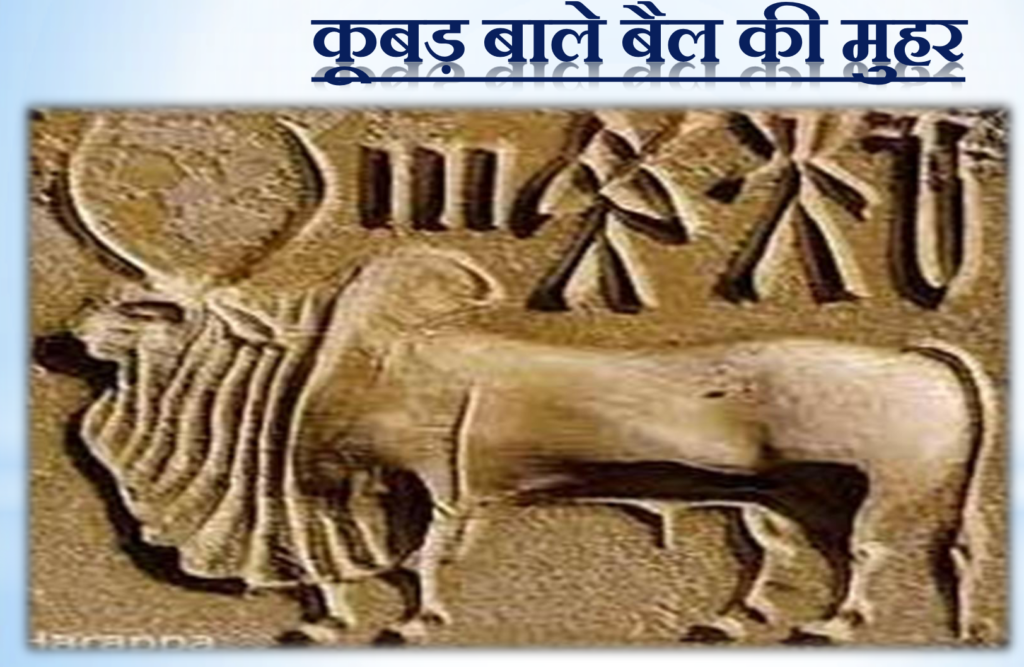
Seals can have a picture symbol or text. They give us clues about the lives, routines, social positions and beliefs of individuals, societies, kingdoms, institutions and organisations. Look at the seals and observe the images and symbols you see. Compare them and discuss what the symbols could be conveying. Notice that all these seals have a picture symbol along with some written text in different scripts.

Seals from various periods of history
2: Field Trip
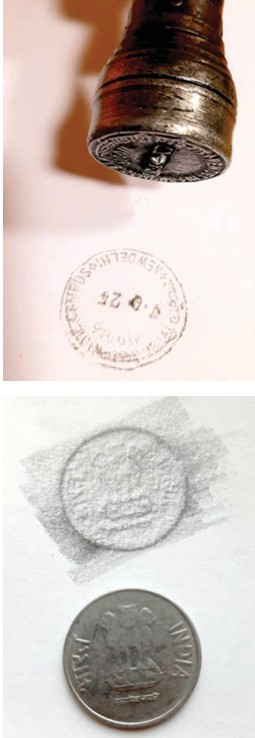
Visit the local post office and meet the post-master, or any other postal official who can show you the seals and stamps that are used in the postal services. Find out and make notes of the following:
1. The material used in the stamp seal.
2. The postal service logo or symbol.
3. Other information that is provided in the seal.
Continue: Have a conversation with the older members in your family, and ask them for documents or postage envelopes that have seals stamped on them. Observe the details of the seal, and make notes or sketches of the symbols and texts that you find.
Experiment: Take any coin. Place a paper over it and using a pencil, create markings of lines over the surface till the image of the coin is visible.
3: Make your own Seal
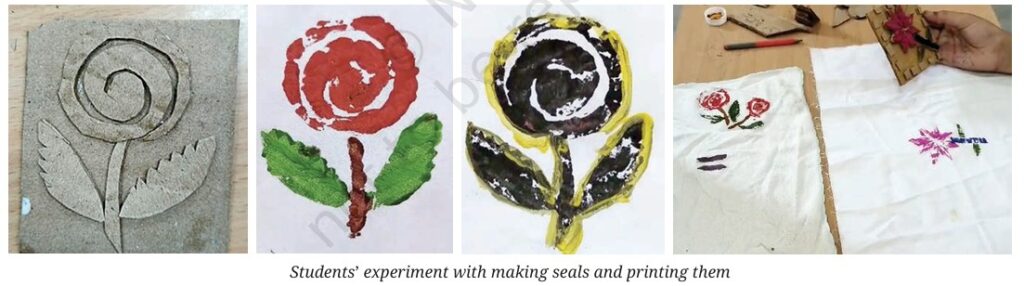
Now that you are familiar with the features and purposes of a seal, would you like to try making your own seal? You will first have to start with its design. Take a paper and a pencil, and jot down some ideas and preparatory sketches.
Step 1 — Test with found objects
• Prepare some clay or dough.
• Gather some small objects like buttons, bottle caps, sticks, leaves, coins, etc.
• Make your clay surface flat and damp.
• Press the objects you have collected on the clay and see the impressions they make.
• Analyse which objects create clearer impressions and why.
Step 2 — Design your seal
• Create your personal symbol. This can be a simple picture that represents you — a face, leaf, flower, fruit, object, animal, letter, icon, etc. It should convey some recognisable qualities you already have or values that are important to you.
• Keep your design simple.
Step 3 — Make your seal
• Recollect the seals you have seen and the materials that are used for creating them.
• Think of alternatives that are easily available in school. For example, pieces of cardboard, clay, jute rope, sponge, rubber, etc.
• Flatten the surface of the material you will work with. Remember that a seal’s impression will be clear if all portions of its design are even.
• Select tools that you can use safely for cutting, carving and shaping your design.
• If you find that your design is difficult to carve, simplify it and complete your design.

Step 4 — Test your seal
• Choose the material and surface for stamping your seal. If your seal is rounded and not flat, you can press it on wet clay or dough as you did in the first test with objects.
• If your seal is flat, try applying paint or ink, and stamping it on any paper.
• Based on the result, you can make changes and improvements to the seal design till you achieve the desired effect.
4: Printing
Now, you have a seal which can be used repeatedly! A rubber stamp pad has ink soaked in it. When we press the rubber seal into the stamp pad, it gets coated with ink which gets printed on paper by pressing.
The same process can be seen across many different traditional processes of printing. Let’s look at the process of hand block printing, because it is quite similar to the rubber stamps you are familiar with, and the seals you have made.
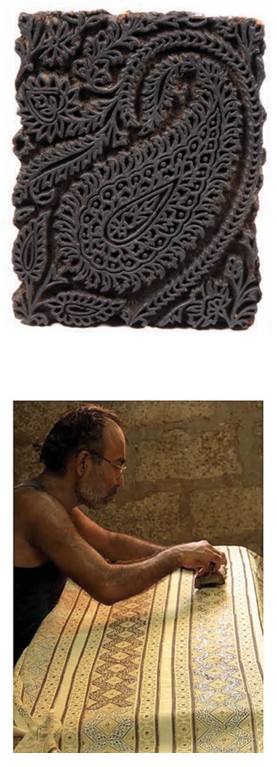
This is a carved wooden block. Notice the portions where the pattern is raised. This block has been carefully carved by an artist who specialises in wood carving. Do you have carpenters and wood carvers in your surroundings?
Meet them and show this picture, ask them how such a piece is carved. Inquire about the tools used and how much time it would take to handcarve this. This wooden block is used for printing on textiles. These textiles are called hand block printed textiles.
Look at the picture of a handblock printer and carefully place the inked block on the cloth. The same block is used repeatedly to create a continuous pattern. He is making a special textile called Ajrakh, which is practiced in Kutch, Gujarat.
Do you think you can create a pattern with your seal? You can even create another seal that is suitable for a continuous pattern. Make a few designs and try them.
History of Seals and Prints
- Ancient civilizations used seals for identification and authentication.
- Clay seals were used in Mesopotamia and the Indus Valley Civilization.
- Royal seals were used by kings and rulers on official documents.
- Printmaking later evolved into an artistic method for creating multiple copies of images and designs.
Materials Used
- Rubber stamps
- Wooden blocks
- Potatoes or vegetables for printing
- Foam sheets
- Ink pads
- Paint
- Rollers (Brayers)
- Paper
- Fabric
- Carving tools
Types of Printing Techniques
1. Stamp Printing
Using ready-made or handmade stamps to create impressions on paper or fabric.
2. Block Printing
Designs are carved on wood or linoleum blocks and printed repeatedly.
3. Finger Printing
Using fingers dipped in paint to create artistic patterns and images.
4. Vegetable Printing
Using cut vegetables such as potatoes, okra, or carrots as natural stamps.
5. Screen Printing
A stencil-based printing technique used on paper, fabric, and other materials.
6. Monoprinting
Creating a unique print that cannot be exactly reproduced.
Steps in Printmaking
- Create or select a design.
- Carve or prepare the printing surface.
- Apply ink or paint evenly.
- Press the surface onto paper or fabric.
- Lift carefully to reveal the print.
- Allow the print to dry.
Importance in Visual Arts
- Encourages creativity and experimentation.
- Introduces students to traditional art techniques.
- Helps understand patterns and repetition.
- Develops design and craftsmanship skills.
- Connects art with history and culture.
Benefits
- Improves hand-eye coordination.
- Enhances observation and creativity.
- Develops fine motor skills.
- Encourages problem-solving and planning.
- Allows easy reproduction of artistic designs.
Applications
- Greeting cards
- Textile printing
- Posters
- Book illustrations
- Decorative papers
- Packaging designs
- Educational art projects
Examples of Seal and Print Activities
- Potato printing
- Leaf printing
- Fingerprint art
- Wooden block printing
- Rubber stamp art
- Fabric printing
Conclusion
Seals to Prints is a fascinating area of visual arts that combines history, creativity, and craftsmanship. From ancient seals to modern printmaking techniques, it demonstrates how images and patterns can be reproduced and shared. Through various printing methods, students and artists develop artistic skills while exploring the rich traditions and creative possibilities of printmaking.