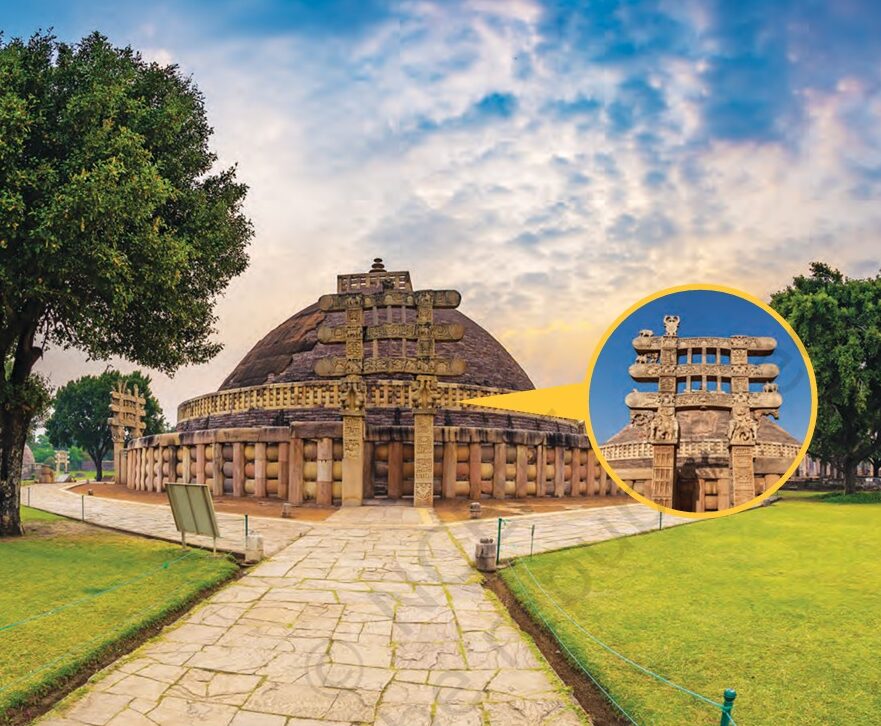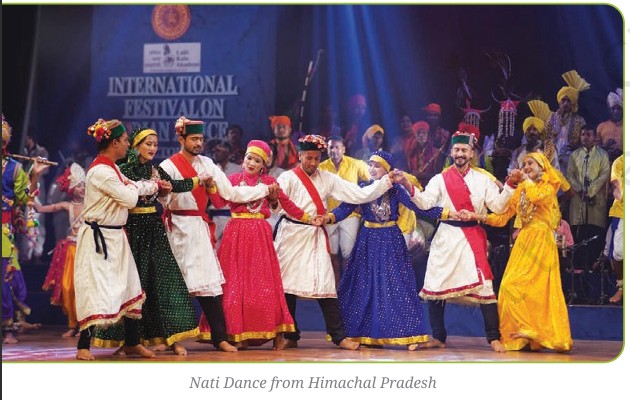

Introduction:
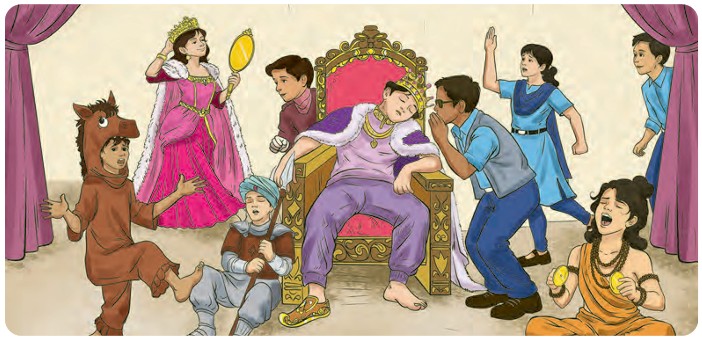
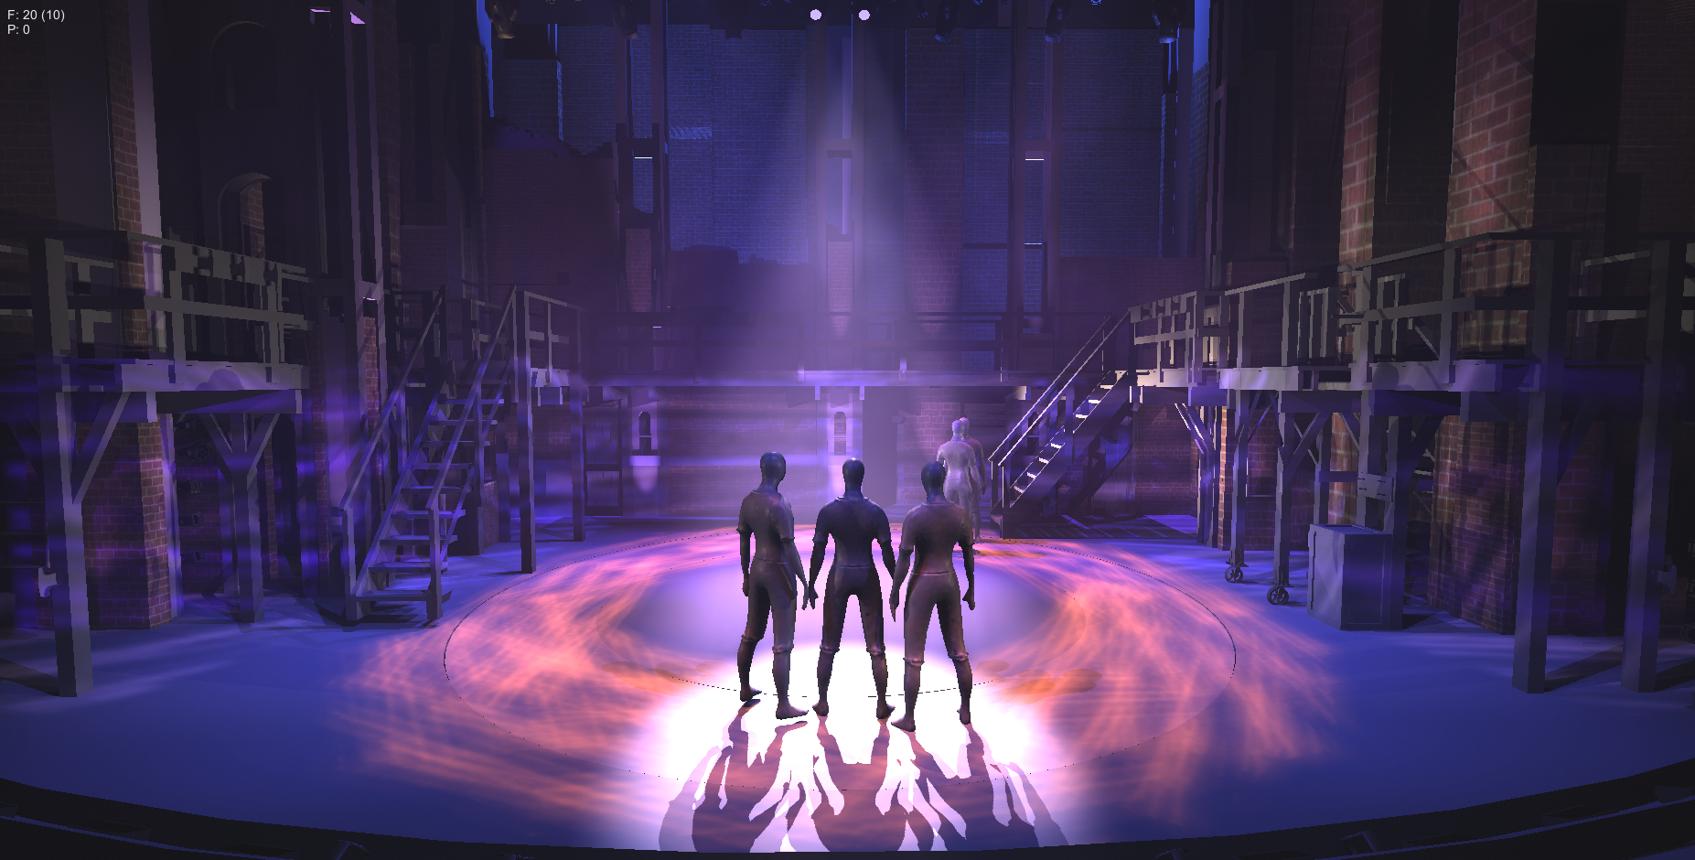
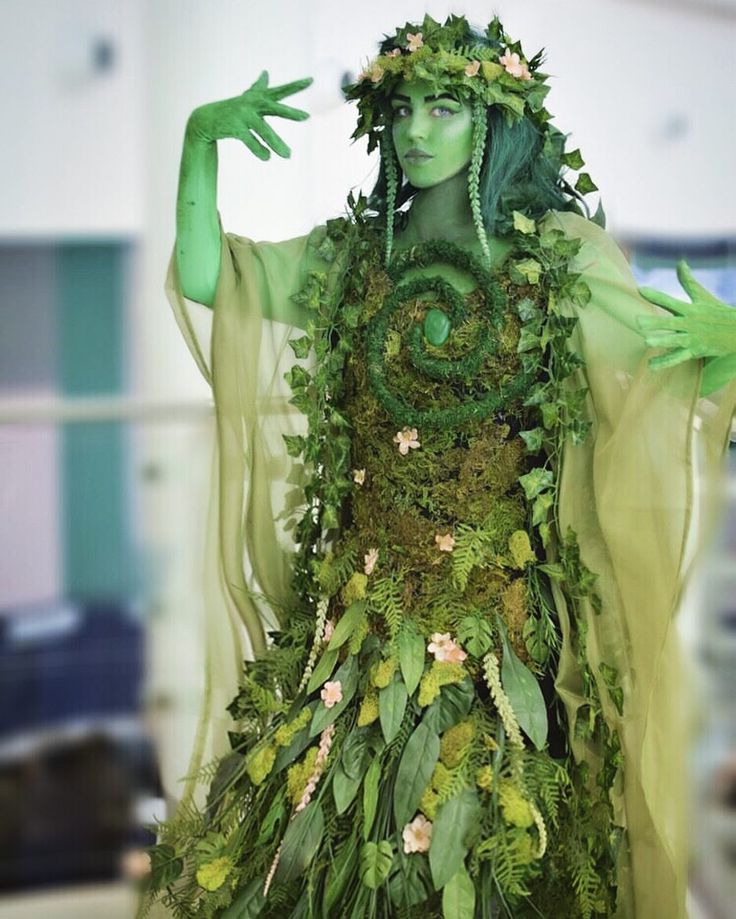
People in Places is an important theme in visual arts that explores the relationship between people and the places where they live, work, learn, and interact. Artists observe human activities, surroundings, buildings, streets, markets, villages, cities, parks, and natural landscapes to create artworks that represent everyday life. Through drawing, painting, sketching, and other artistic techniques, they capture the experiences, emotions, traditions, and stories of people in different environments.
The places around us provide endless inspiration for artistic expression. A busy marketplace, a peaceful village, a crowded railway station, a school playground, or a colourful festival can become the subject of an artwork. Artists carefully observe the people, their body language, clothing, activities, and interactions with their surroundings. They also pay attention to shapes, colours, lines, textures, perspective, and the arrangement of objects to create a sense of space and depth in their compositions.
People in Places also helps us understand the cultural and social diversity of human life. An artwork depicting a traditional celebration may reveal local customs and clothing, while a painting of a city street may show modern lifestyles and everyday activities. By representing different communities and environments, artists can communicate ideas about identity, relationships, occupations, traditions, and changes in society.
This theme encourages students to develop observation skills, imagination, creativity, and visual storytelling abilities. Students can begin by observing their surroundings, identifying interesting scenes, and sketching people engaged in everyday activities. They can experiment with different colours, perspectives, compositions, and artistic materials to express what they see and feel.
In conclusion, People in Places teaches us that art is closely connected to the world around us. By observing people and their environments, students learn to appreciate everyday experiences, understand cultural diversity, and express meaningful stories through visual images. It reminds us that ordinary places and familiar activities can become extraordinary subjects when viewed through the creative eyes of an artist.
Introduction to Perspective: Discover the Magic of Depth, Distance, and Realism in Visual Arts:
Paintings and drawings have the power to transport us into different worlds through the beauty of lines, shapes, patterns, colours, and textures. Some artworks appear flat and two-dimensional, while others seem to have depth, making objects look as though they are emerging from the surface. Have you ever wondered how artists create this amazing illusion? The answer lies in a visual art technique known as perspective.
Perspective is the technique of representing three-dimensional space on a two-dimensional surface, such as paper, canvas, or a wall. It creates the illusion of depth and distance, helping artists make their drawings and paintings appear more realistic. Through perspective, objects in the foreground appear larger and more detailed, while objects in the background generally appear smaller and less distinct. This helps viewers understand the relative positions, sizes, and distances of objects within an artwork.
Perspective is commonly used to represent roads, railway tracks, buildings, bridges, landscapes, rooms, and city streets. For example, when you look at a long road, its edges appear to move closer together as they extend into the distance. Similarly, distant buildings and trees appear smaller than those nearby, even when they are actually large objects. Artists carefully observe these visual effects and use them to create a convincing sense of space in their compositions.
There are different ways to create perspective in visual arts. Linear perspective uses lines and vanishing points to show depth, while atmospheric perspective uses changes in colour, contrast, and detail to make distant objects appear farther away. By understanding these techniques, artists can make their work more realistic, balanced, and visually engaging.
Learning perspective also develops observation, concentration, spatial awareness, and creative thinking. Students can practise by observing their surroundings, sketching roads, buildings, corridors, or landscapes, and noticing how the appearance of objects changes with distance and viewpoint.
In conclusion, perspective is a powerful artistic technique that transforms a flat surface into a convincing representation of a three-dimensional world. Through careful observation and regular practice, students can learn to create depth, distance, and realism in their drawings and paintings. Perspective helps artists turn simple lines and shapes into scenes that appear full of space, dimension, and life.
Understanding the Horizon Line and Vanishing Point in Perspective
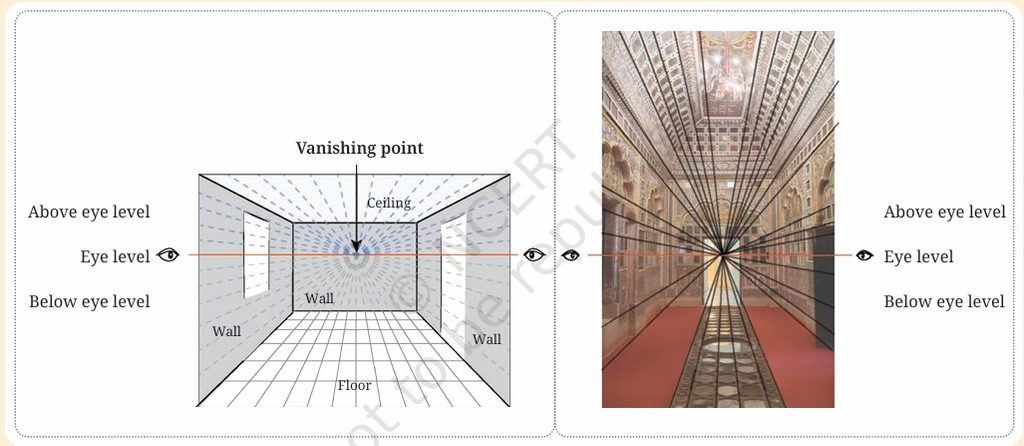
When we look at a long road or railway tracks, we notice an interesting visual effect. Although the lines on either side of the road or the railway tracks are parallel in reality, they appear to move closer together as they extend into the distance. Eventually, they seem to meet at a single point. Artists use this natural effect to create the illusion of depth and distance in drawings and paintings.
Observe
1. The Horizon Line
The horizon line is an imaginary horizontal line that represents the viewer’s eye level. When we look straight ahead across an open landscape, the horizon often appears where the land or sea seems to meet the sky. In perspective drawing, the horizon line helps artists determine the position of objects and the vanishing point.
2. The Vanishing Point
The vanishing point is the point on the horizon line where parallel lines appear to converge as they extend into the distance. For example, the edges of a straight road or railway tracks seem to meet at this point. Although the lines remain parallel in reality, our eyes perceive them as getting closer together with distance.
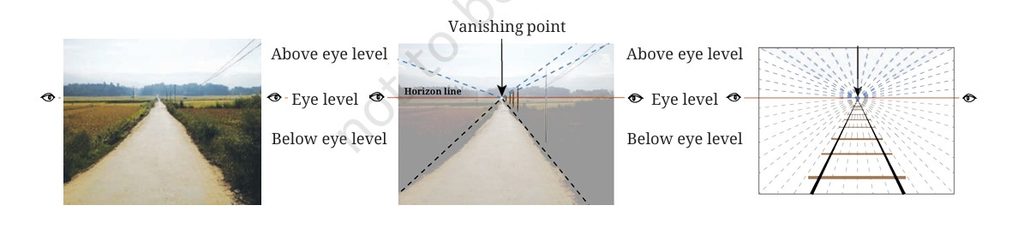
Visualising Perspective
To draw objects realistically, we need to understand three important elements of perspective:
- Horizon Line: The horizontal line at the viewer’s eye level.
- Vanishing Point: The point where parallel lines appear to meet in the distance.
- Converging Lines: Lines that appear to move closer together as they go farther away.
Perspective helps us draw buildings and monuments realistically. For example, on the reverse of the Indian ₹100 note, the lines of Rani ki Vav stepwell appear to converge, creating a sense of depth and distance.
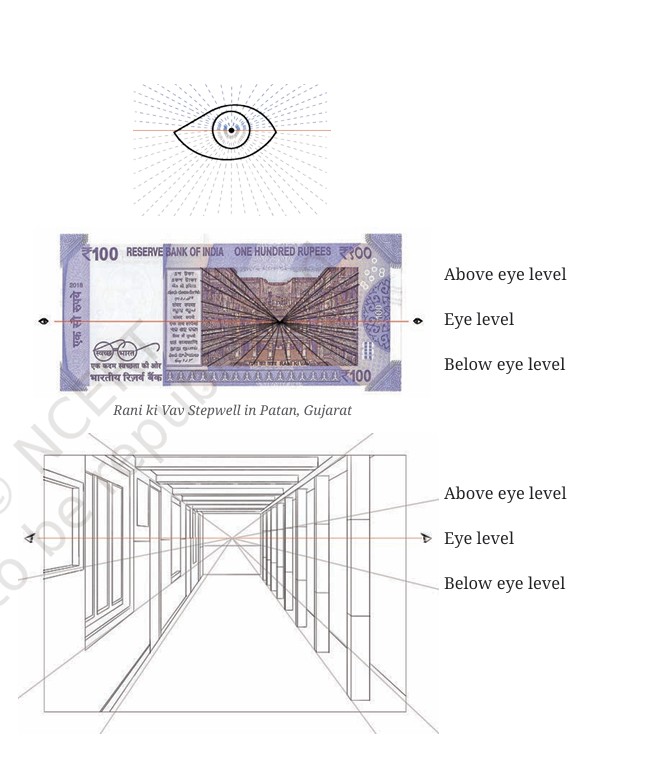
Perspective drawing helps us understand how lines appear to meet at a vanishing point in photographs of building interiors. By learning its basic principles, we can easily draw simple objects from different angles and make them look realistic and three-dimensional.
ACTIVITY 17.1: MAKE A VIEWING GRID
A viewing grid is a simple tool that helps artists observe objects carefully and draw them with correct proportions. It divides a scene into small squares, making it easier to understand shapes, positions, and details. A viewing grid can help beginners draw buildings, landscapes, and everyday objects more accurately.
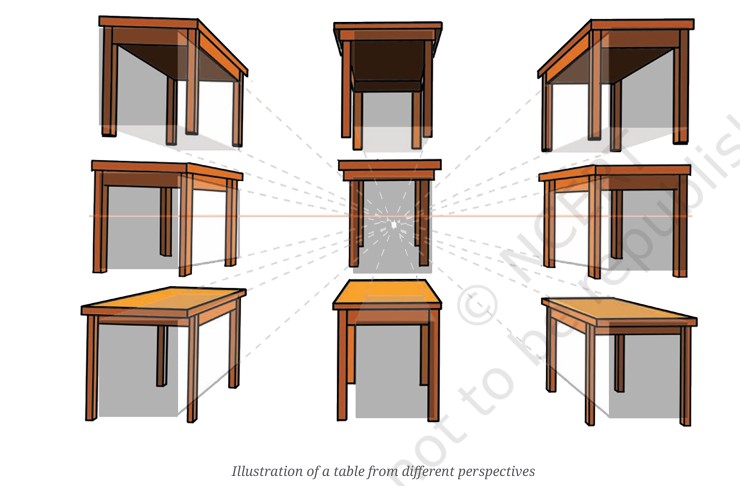
1.) Illustration of a table from different perspectives
Illustration of a table from different perspectives means drawing a table as it appears when viewed from different angles. These views include the front view, top view, side view, three-quarter view, bird’s-eye view, and worm’s-eye view.
Each perspective shows different parts and features of the table. Observing an object from various angles helps us understand its shape, size, proportions, and structure. It also teaches us how objects appear to change when viewed from different positions.
Practising perspective drawing improves observation skills, creativity, and drawing accuracy, helping artists create more realistic and three-dimensional illustrations.
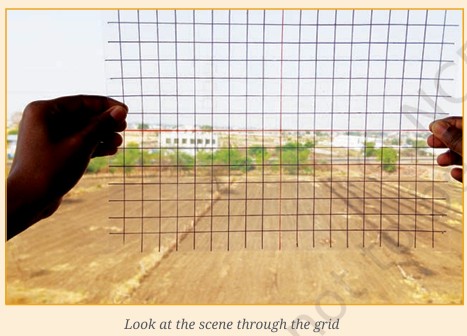
2.) Look at the scene through the grid
Observe the scene through a viewing grid and identify the lines that align with the horizon line. Notice the shapes, positions, and sizes of objects in relation to the grid’s lines and squares. Compare the angles of lines in nearby objects with those of distant objects.
This activity helps you understand perspective, proportions, and depth, making it easier to draw a scene accurately and realistically.
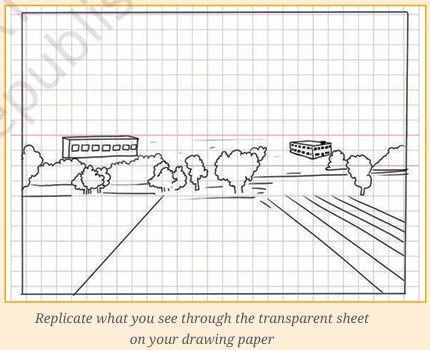
3.) Replicate what you see through the transparent sheet on your drawing paper:
Choose a scene that you want to draw, such as a garden, a street, or a landscape. Look carefully at the scene through a transparent viewing grid and copy the shapes, lines, and objects onto your drawing paper using a similar grid. Observe the positions, sizes, and proportions of different objects to create an accurate drawing and show perspective.
You can use the same viewing grid to draw different scenes and improve your observation skills. With regular practice, you will gradually learn to draw scenes accurately and confidently without using a viewing grid.
Human Anatomy
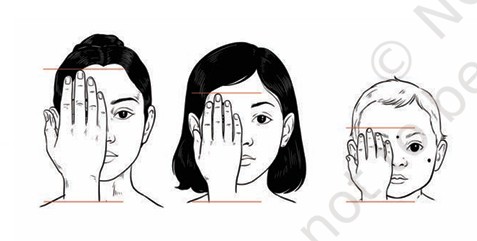
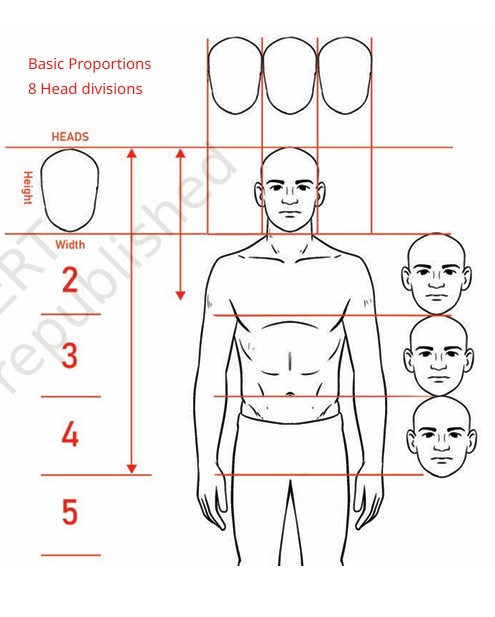
Human anatomy is the study of the structure of the human body and its different parts. By looking at our old photographs, we can observe how our body structure has changed from infancy to the present. As we grow, different parts of our body develop at different rates. In drawing, the relationship between the sizes of various body parts is measured using ratios and proportions.
For example, the head can be used as a unit of measurement to compare other body parts.
Some parts may be equal to the head in size (1:1), while others may be twice (1:2) or three times (1:3) its size. Understanding these proportions helps artists draw the human body more accurately and realistically.
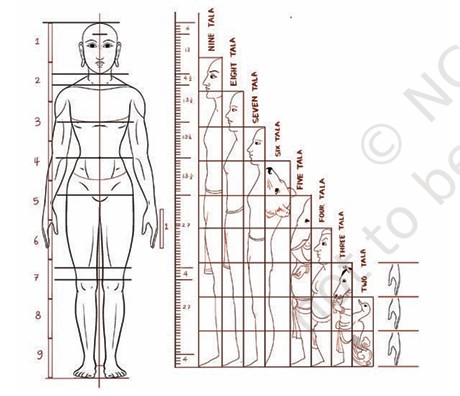
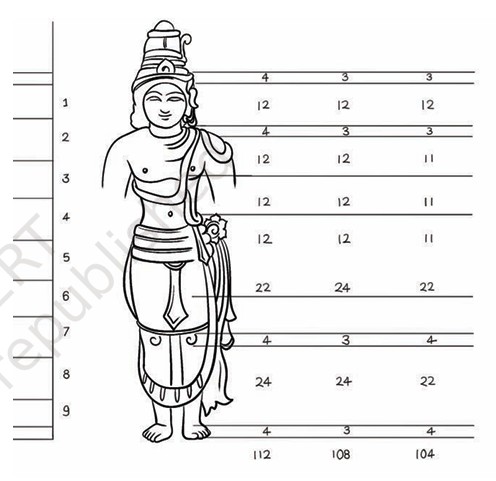
The system of measuring ratios and proportions has been an important part of traditional Indian painting and sculpture for centuries. Ancient Indian texts known as the Shilpa Shastras describe rules for representing different figures, including gods and goddesses,
kings and queens, warriors, children, animals, and other mythological beings. These rules help artists maintain the correct proportions and create balanced, harmonious figures.
This traditional system is known as the Tālamāna Paddhati. In this method, the word tāla refers to a unit of measurement based on the length of an adult hand, measured from the bottom of the wrist to the tip of the middle finger. Artists use this unit to measure different parts of the body and maintain their proper relationships. The system demonstrates the importance of accuracy, balance, and proportion in Indian art.
It also reflects the rich artistic knowledge and traditions passed down through generations of Indian painters and sculptors.
ACTIVITY 17.2: MARK THE PROPORTIONS
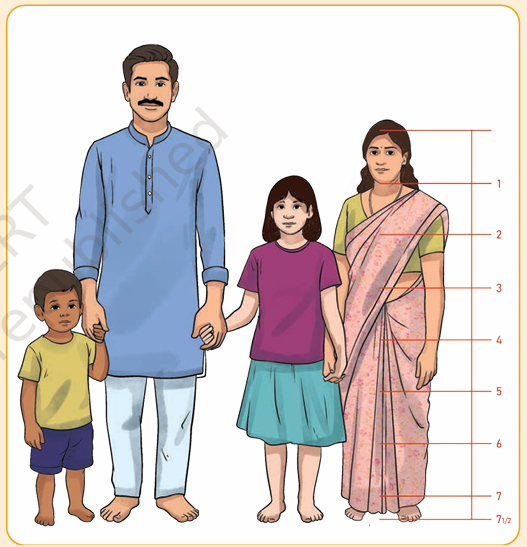
To mark the proportions of the people in a picture, first draw two horizontal lines to indicate the height of the head. Measure the distance between these lines and use it as a unit to mark additional horizontal lines along the length of each person’s body.
Count how many times the head measurement is repeated in the total height of each human figure. Then, write the ratio of the person’s height in relation to the head, such as 1:6, 1:7, or 1:8, depending on the figure.
Repeat this process for all the people shown in the picture. Finally, compare the proportions of different figures and discuss the differences you observe. Children generally have larger heads in proportion to their bodies, while adults tend to have longer limbs and more developed body structures.
Body proportions also vary according to age, height, body type, and individual characteristics. This activity helps develop observation and drawing skills.
ACTIVITY 17.3: DRAW YOUR FRIENDS
Every person has unique body proportions that make them look different from others. There is no single set of proportions that fits everyone, as people differ in height, body shape, head size, and the length of their arms and legs. To understand these differences, observe your friends and classmates carefully and practise drawing their full-body figures. Take turns posing in standing positions so that everyone gets an opportunity to observe and draw.
Step 1: Observe and Measure the Head
Begin by observing the head and noting its size in relation to the entire body. Use your pencil as a measuring tool, just as you did while drawing still-life objects. Hold your pencil at arm’s length and compare the size of the head with the height of the body. Estimate how many times the head measurement fits into the total body height. Use this measurement as a guide for maintaining the correct proportions.
Step 2: Make Rough Markings
Using the measurements you have taken, make light and simple markings on your drawing paper. Mark the top of the head, shoulders, waist, hips, knees, ankles, and feet. These guide marks will help you plan the figure and ensure that the entire body fits comfortably on the paper. Draw simple shapes and lines to represent the different body parts before adding details.
Step 3: Draw and Check the Proportions
Gradually develop your drawing by adding the shapes of the head, neck, torso, arms, hands, legs, and feet. Continue measuring and checking the proportions as you draw each part. Compare the length and width of different body parts with one another. Pay attention to the person’s posture, the position of the arms and legs, and the overall body shape. Focus on drawing what you actually observe rather than following fixed rules about how a person should look.
Step 4: Complete and Share Your Drawing
Once you are satisfied with the proportions, refine the outlines and add details such as facial features, hair, clothing, and folds in the fabric. Erase unnecessary guidelines and add shading if needed to show light, shadow, and volume. Share your completed drawing with your friends and ask your teacher for feedback. Identify the parts that look proportionate and the areas that need improvement.
Learning Outcome: This activity develops observation, measurement, and drawing skills. It helps you understand that every individual has unique body proportions and teaches you to represent people accurately through careful observation and regular practice.
Body Positions and Postures
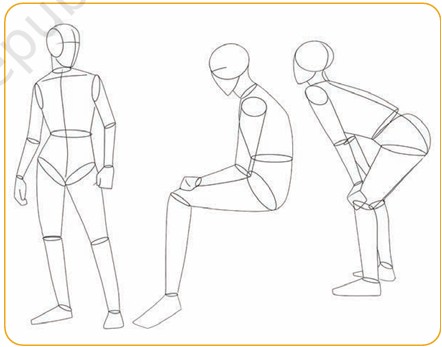
After making one or two drawings of a standing human figure, begin observing the human body in different positions and postures, such as sitting, bending, lying down, squatting, and stretching. Each posture changes the appearance of the body and the relationship between its different parts. For example, when a person sits, the legs bend and the overall height of the figure appears shorter. When a person bends forward, the shape and angle of the torso change. Similarly, when a person lies down, the body extends horizontally rather than vertically.
Ask your friends or family members to pose in different positions while you observe and draw them. Pay attention to the angles of the arms and legs, the curves of the back, the position of the head, and the way body parts overlap. Use your pencil to measure and compare proportions, just as you did when drawing standing figures. Make light sketches first, then add details to complete your drawings.
Finally, share your drawings with your friends and family members and explain what you have learnt about human body proportions, posture, balance, and movement. This activity will improve your observation skills and help you draw human figures more accurately and expressively.
ACTIVITY 17.4: COMPOSITION IN PERSPECTIVE
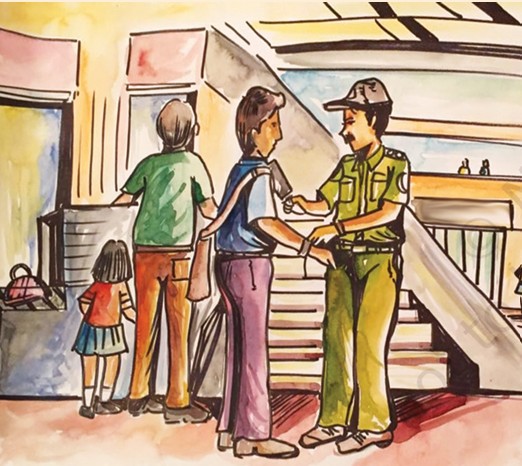
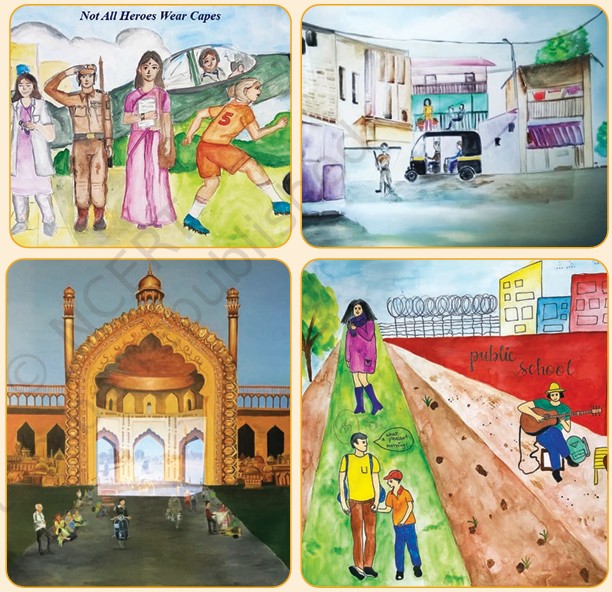
Composition in perspective is an art technique that helps artists create realistic and balanced scenes by showing people and objects at different distances. After learning about perspective and human proportions, you can create your own compositions featuring people in indoor or outdoor settings, such as a classroom, a park, a street, or a village.
Step 1: Make Preparatory Sketches
Begin by making a few rough sketches to plan the layout of your composition. Use your earlier drawings to arrange the foreground, middle ground, and background elements. Mark the horizon line and the vanishing point to establish perspective. Start with three human figures placed at different distances, with one figure nearby and another farther away. Draw the people and other elements, such as furniture, trees, roads, vehicles, and buildings, according to their positions and sizes. Remember that human figures should look proportionate to their surroundings.
Step 2: Choose a Layout
Review your preparatory sketches and show them to your teacher. Discuss your ideas, listen to suggestions, and select the layout that best communicates your intended scene. Consider the placement of people, the balance of objects, and the overall appearance of the composition before choosing your final design.
Step 3: Begin the Final Artwork
Line Drawing: Use your selected sketch as a reference and begin drawing the main outlines of the scene. Carefully draw the human figures, buildings, furniture, trees, and other objects while maintaining correct proportions and perspective.
Edits and Changes: As you work, make small changes or add details wherever necessary. Adjust the shapes, positions, and sizes of objects to improve the composition and make the scene more interesting.
Step 4: Colouring Process
Choose a suitable colouring medium, such as colour pencils, pastels, crayons, watercolours, poster colours, acrylic colours, or natural colours. Select a colour theme based on the season, time of day, atmosphere, or mood you want to express. For example, warm colours can represent a sunny afternoon, while cool colours can create a peaceful evening atmosphere. Experiment with different colour combinations in your preparatory sketches before applying colours to your final artwork.
Step 5: Give Your Artwork a Title
After completing your artwork, think about the ideas, inspirations, memories, and personal experiences behind it. Choose a short, meaningful phrase that expresses the main idea or feeling of your composition. For example, a drawing of children playing in a park could be titled A Joyful Afternoon. Your teacher can display the completed artworks in the classroom and organise a discussion where everyone shares their ideas, creative choices, and learning experiences.
Conclusion:
The topic People in Places helps us understand how people and their surroundings can be represented through visual art. By observing people in different environments, we learn to draw human figures with accurate proportions, natural postures, and realistic movements. We also discover that every individual has unique body proportions, which make each person different from others. Activities such as drawing friends, studying human anatomy, exploring body positions, and using a viewing grid help us improve our observation and drawing skills.
Learning about perspective teaches us how to show depth and distance in an artwork. By using the horizon line, vanishing point, foreground, middle ground, and background, we can create compositions that appear more realistic and balanced. We also learn to arrange people, buildings, trees, furniture, roads, and other objects according to their positions and sizes. Choosing suitable colours, adding details, and giving our artwork a meaningful title make our compositions more expressive and attractive.
Most importantly, People in Places encourages us to observe everyday life carefully and appreciate the relationship between people and their environments. It develops creativity, patience, imagination, and confidence while helping us express our thoughts, feelings, experiences, and memories through art. With regular practice, we can create meaningful artworks that capture the beauty, diversity, and activities of human life in different places.